Setting up your first registration
Registrations are how you collect sign-ups and payments for teams, camps, tryouts, tournaments, and other programs. You can set up one-time payments or installment plans, control enrollment windows, collect player info, and require document agreements — all in one place.

How to create a registration
Registrations are how you collect sign-ups and payments for teams, camps, tryouts, tournaments, and other programs. You can set up one-time payments or installment plans, control enrollment windows, collect player info, and require document agreements — all in one place.
Getting started
From the left-hand menu, click Offerings
Click Registrations
Click Create in the top-right corner
Enter a Title and Description — both are public-facing and visible to customers on your portal
Select a Payment Type
From here, complete the four configuration tabs:
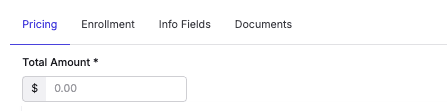
Pricing tab
Set the total price for the registration, excluding processing fees. Fees are calculated and displayed to customers at checkout.
Installment plans
Toggle Allow installments to split the total into multiple payments. You'll then configure two settings:
Collect on — when future payments are scheduled
Installments — how many payments to split the total into
Installment #1 is always collected at enrollment. The payment method used at enrollment is saved and automatically charged for all future installments unless updated by the customer or an admin.
Installment Options | What it does |
|---|---|
1st of each month | Payment #1 collected at enrollment. Subsequent payments charged on the 1st of each month. |
15th of each month | Payment #1 collected at enrollment. Subsequent payments charged on the 15th of each month. |
Custom dates | Payment #1 collected at enrollment. You set specific dates for each subsequent payment. |
N+1 logic for monthly cadences: If a customer enrolls close to the billing date, the system skips the immediately upcoming date and schedules the next payment for the following month. For example, if billing is set to the 1st and someone enrolls on the 25th, installment #2 will be scheduled for the 1st of the month after next — not the 1st of the following month.
Custom dates catch-up rule: If a customer enrolls after a scheduled payment date has already passed, they will be charged all amounts due through that date at the time of enrollment.
Example — custom dates with catch-up: $4,000 registration · 2 installments · custom dates— Installment #1: $2,000 due at enrollment— Installment #2: $2,000 due 05/25/2026If a customer enrolls after 05/25/2026, both installments ($4,000 total) are collected at enrollment.
Custom installment amounts: You can set a different dollar amount for each installment — great for deposit structures. For example: $150 due at enrollment, then $500/month starting August 1st.
Enrollment tab
Field | What it does |
|---|---|
Category | Tags the registration so customers can filter by category on your portal (e.g. Team, Camp, Tryout) |
Start date / End date | The dates the program runs. Optional — displayed to customers for reference. |
Min / Max participant age | Restricts registration to a specific age range. Optional. |
Auto-open enrollment | Registration won't accept sign-ups until this date. Useful for scheduling future programs in advance. |
Auto-close enrollment | Registration stops accepting new sign-ups after this date. |
Participant limit | Defaults to no limit. Uncheck "No Limit" and enter a value to cap total registrations. |
Visibility: Public | Visible on your portal — any customer with your portal link can find and register. |
Visibility: Private | Not visible on your portal. Customers can only register if invited directly or sent the private link. |
Info Fields tab
Collect additional information from customers at the time of registration. Fields are organized into two groups: Player Info (date of birth, grade, height, school, social handles, etc.) and Athletic Info (position, throws, bats, etc.).
Enabled — the field appears on the registration form
Required — the customer cannot complete registration without filling it in
All collected info field data is available for export via Download Participants CSV in the Actions menu.
Documents tab
Upload PDF, .doc, or .docx files for customers to review at registration. Check Require sign-ups to review and agree to document(s) to make acceptance mandatory before completing registration.
Common use cases: release of liability, team code of conduct, terms of service.
Opening enrollment & sharing
After saving your registration, click into it and select Actions in the top-right corner
Click Open Enrollment to begin accepting registrations
Click Share to distribute the registration
You can make a registration private at any time by selecting Make Private from the Actions menu. This removes it from your portal but preserves all existing enrollments.
Additional Resources:
Understanding The Payments Log
Resources By Role: